Proper histograms for image printing.
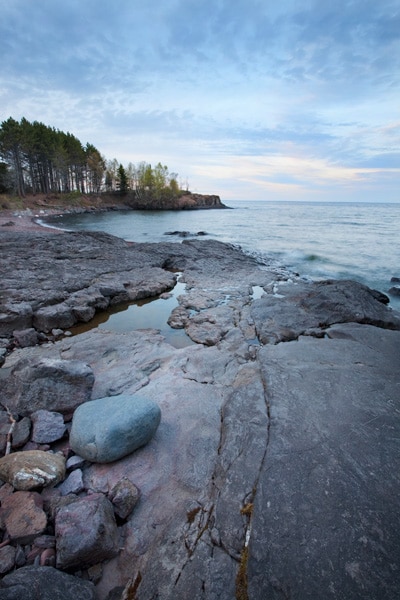
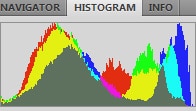
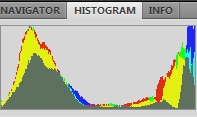
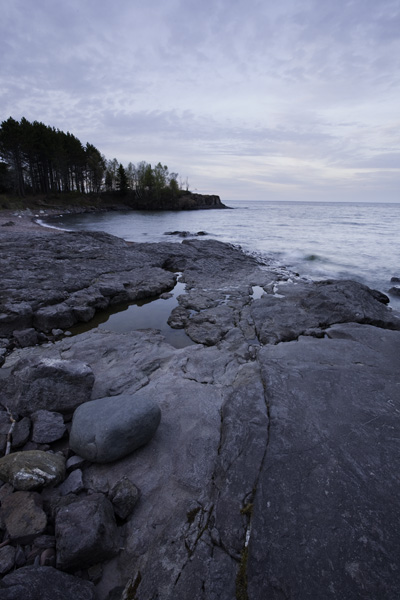
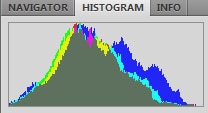
Landscape photographers frequently have to deal with extremes in light intensities within a single image. A situation that is typically found in landscape images is when the light intensity in the sky is much greater than the light intensity in the foreground as is the case in our sample photograph below. Take a look at the histogram for this image. Looks a little like the profile of a Bactrain Camel’s back (a two hump camel.) If we try to print this image we will end up with an image that is muddy and flat looking in the foreground and washed out in the sky. In this instance we need a histogram that has data well distributed throughout; or a histogram that looks like a Dromedary Camel (a one hump camel.)

There are three approaches to this problem:
Graduated Neutral Density Filters
When making the image we could have used a “graduated split neutral density filter”. This rectangular filter fits on the front of your lens and you simply move it up or down depending upon where the horizon lies in your photo. My favorite filter is made by Tiffen, it is a .06 graduated neutral density filter (or 2 stop density.) I like Tiffen because their filters are made of glass which gives the best color quality. Resin filters tend to render off colors in the density area. You will notice that this image’s histogram is closer together or moving towards a one-hump look but the image still requires some post processing to print well.
High Dynamic Range
The next method is to make this image as a HDR (High Dynamic Range) photograph. This requires making a series of exposures of the same scene; bracketing from a proper exposure for the foreground to a proper exposure for the sky. The image was then post processed using special software (available in Photoshop or Photomatix) to combine the various exposures into one resulting image. This popular process results in an image that combines the best of all exposures and results in an image that has a one hump camel’s back histogram and a full range of data across the histogram that will result in a pleasing print with good color and tonality throughout the image. In the Photomatix software, which is my preferred method of making HDR images, there are several controls that allow the photographer to adjust contrast, saturation, intensity of the HDR blend, and special effects. This image is a pretty straightforward rendition.
Post Processing and the History Brush
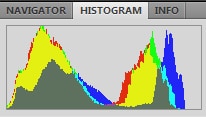
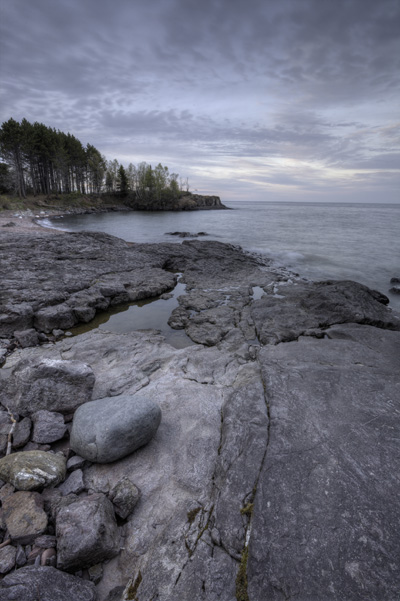
My favorite technique is to post process the image in Camera Raw and Photoshop to obtain a proper one-hump histogram and an image that will print with dynamic color and tonality. The image below was exposed in camera with the post processing in mind to achieve the look and feel I envisioned when I photographed the scene. This method offers me the highest degree of control while still maintaining a natural look and feel.
I use a careful selection of post processing in Camera Raw: typically I add a little Fill Light, a small amount of Recovery and a careful selection of overall Exposure which is usually a slight movement of the Exposure slider to the left.
These adjustments result in a good starting point for the image in Photoshop. Once the image is in Photoshop I burn and dodge (lighten and darken) selective areas to bring the image into a one-hump histogram (although not a true one hump it is well within the tolerances for printing.) With this method I have the greatest control over exactly how much lightness, darkness or saturation I want to add to a given area of the photograph. My technique for burning, dodging, and saturation adjustments is with the “history brush”. If you need a tutorial on the “history brush” look for it on the next newsletter.