
This is the second in a series of three articles about how to photograph an eclipse of the sun.
This last week on October 14, 2023 there was a total Annular eclipse of the sun. It originated in Oregon and passed through the SW of the US, into Mexico and South America.
I lead a workshop in Monument Valley where we were fortunate enough to view and photograph the total eclipse. I used two camera set ups for this photography. I used my Fujifilm X-T5 Aps-c sensor camera with a 100-400 and 1.4 teleconverter which resulted in about an 840mm equivalent on a full frame camera.
The second camera set up I used was my Fujifilm GFX medium format camera with a 20-35 @ about 25mm or about the equivalent to a 21mm on a full frame camera.
On both camera set-ups I used a Haida 20 stop solar filter. This protected my eye and the camera sensor from harmful solar rays during the eclipse.
As part of the workshop prior to the actual eclipse event, we went out a couple of days prior at about the same time of the day as the eclipse. Everyone set up their cameras just as if we were photographing the eclipse and practiced photographing the sun. This proved an invaluable exercise. When the day of the eclipse came, everyone was familiar with what they needed to do and how to do it.
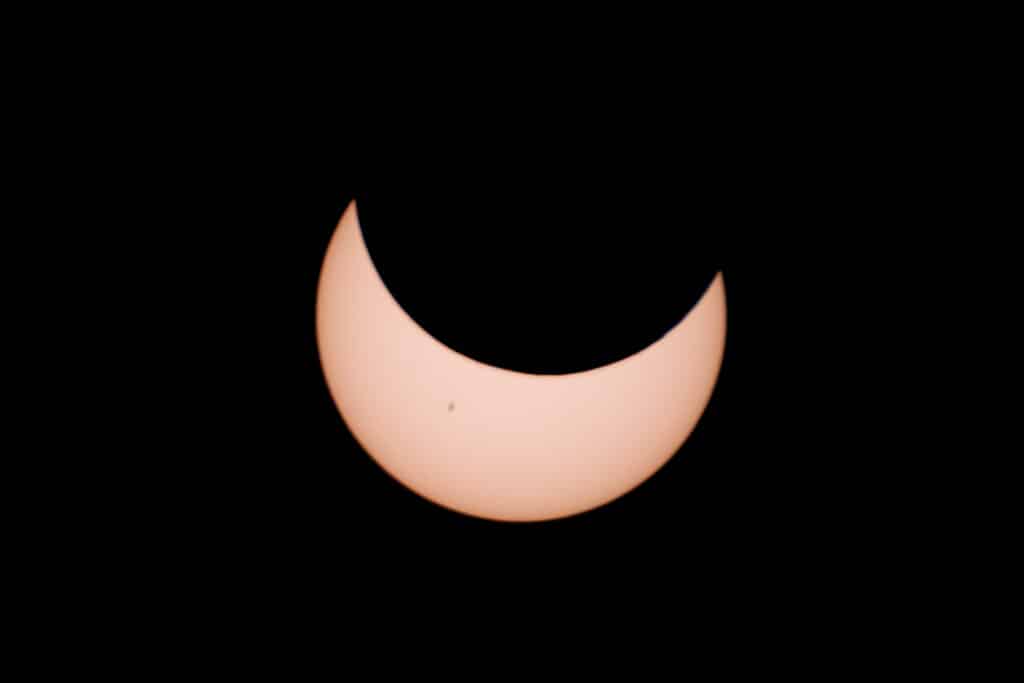
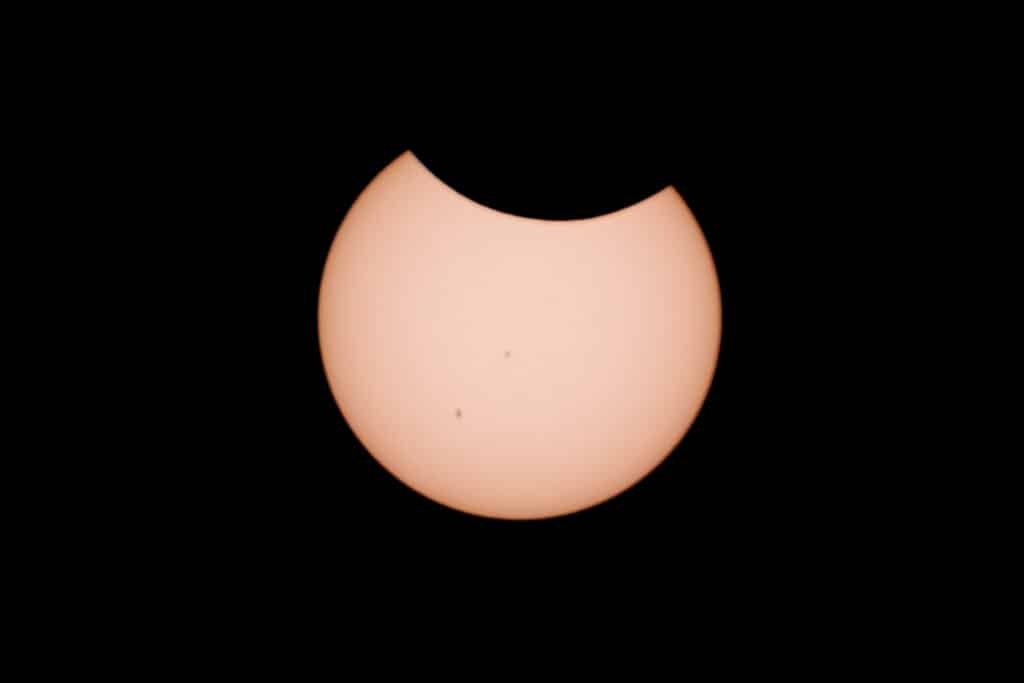
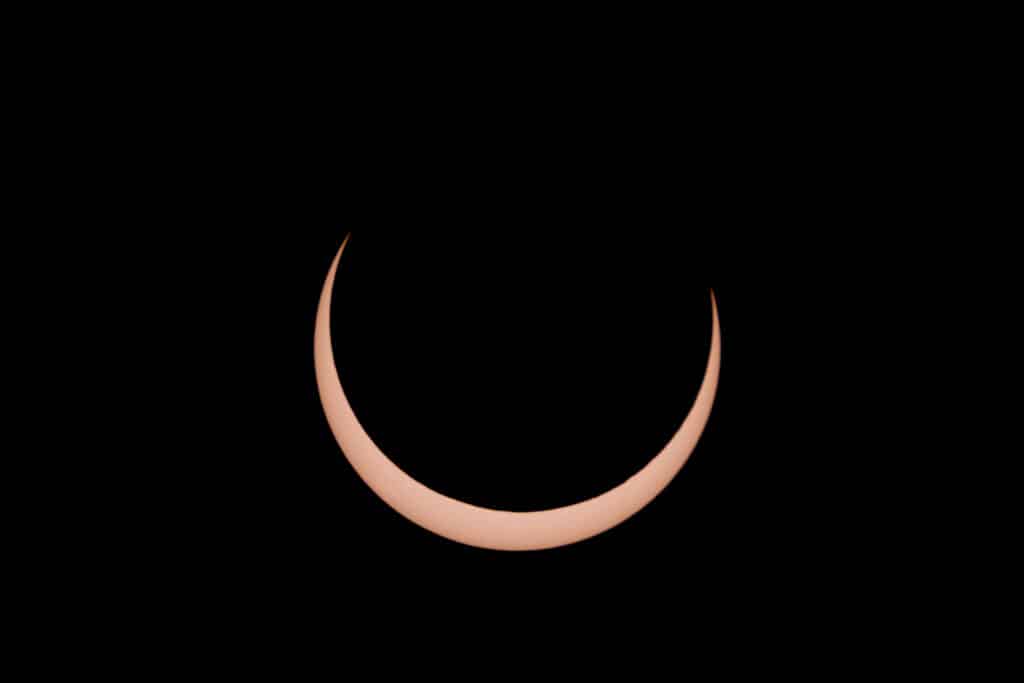
The long lens set up was mounted to a tripod with a standard ball head. I placed the solar filter on the lens and composed the sun in the frame. I used manual focus to focus on the edge of the sun. I selected an exposure of f8 @ 1/250th second, ISO 400. This exposure setting was about 2-3 stops below what the camera indicated was a proper exposure. This is because the camera is reading an average of the sky around the sun as well as the sun surface. For a proper exposure you want to only give a proper exposure of the surface of the sun. I could have used the spot metering function to give me the proper reading, but I used the average and adjusted from there. Same result in the end. Once you set your exposure settings you’ll want to leave them at that for the entire duration of the eclipse, with the exception of during the 4 minutes or so of the total portion of the eclipse when there is the “ring of fire”. You will want to try some brackets around your exposure settings as during a total eclipse you’ll not see any of the surface of the sun but only the aura around the sun and that will have a slightly different exposure.
I then set the camera’s intervalometer to take a photograph every 30 seconds for 2 ½ hours. This was more than the approximately 2 hour duration of the eclipse. If your camera doesn’t have a built in intervalometer or sequence shutter settings, you’ll want to purchase an external intervalometer which connects via the cable release port. This makes the process for capturing the eclipse much easier. I also think in hindsight that every 30 seconds was over-kill. A setting of every 2 minutes would be fine. I would turn the intervalometer off during the 4 minutes of totality and shoot in a more continuous mode so you are able to bracket the exposure and have more image files to select from during the critical totality portion of the eclipse. Turn it back on for the portion of the eclipse that is coming out of the totality.
Because I did not have a celestial tracker mounted to the tripod I had to manually adjust the framing of the images about every 2 minutes or so. This was not a big deal. Any adjustments to your set up during the exposure time of the eclipse should be done carefully so you don’t bump the focus or exposure settings.
On the wide angle image we were fortunate to have arranged a back-country tour of Monument Valley. What this meant was we had an awesome setting to view and photograph the eclipse. It also meant that other than another group of photographers which were set up some 200 yards away we were all by ourselves, and that made the event even more special and intimate.
The wide angle shot establishes the context of the eclipse and provides a backdrop to place the close up images. I took some photographs of the scene at the very beginning with out a solar filter on. I then placed the solar filter and set the camera for an overall exposure pretty close the equivalent of the close up camera. What this meant was that the resulting images with the solar filter in place only recorded the sun as a dot in a field of black. That is fine as really all these images do is to record the path of the sun and the eclipse through the sky. During the total portion of the eclipse I removed the solar filter and made a couple of exposures of the scene with the sun in total eclipse phase. As this was an annular eclipse there was still a fair amount of light on the scene. I bracketed these exposures. Afterwards I replaced the solar filter and let the camera’s intervalometer finish the sequence of picture taking.
During most of the eclipse we were standing around with little to do other than adjust framing occasionally and tell stories. It was a very pleasant experience and we got to listen to stories from our guides who had grown up in Monument Valley. When the eclipse was over we collected our gear and I knew that the work of creating photographs of the eclipse was only partly done.
Next month I’ll publish the third and final article on post processing and compositing an eclipse photographic illustration.